
Instagram has over 2 billion monthly active users, yet there’s still no official desktop app for Mac, and the Windows app comes with its own limitations. Whether you’re a content creator who prefers a bigger screen for editing, someone who types faster on a physical keyboard, or you simply don’t want to reach for your phone every time a notification pops up, getting Instagram on your computer is easier than you’d expect.
This guide walks you through four easy options to set up and run Instagram on your Windows PC or Mac. Each method has different strengths, so we’ve included a comparison table to help you pick the one that fits your workflow.
Table Of Contents
- Method 1: Official Instagram App (Windows)
- Method 2: Android Emulator (Windows & Mac)
- Method 3: Instagram Web Version (All Platforms)
- Method 4: Progressive Web App (PWA) for Mac Users
- Which Method Is Best for You?
- How to Post on Instagram from Your Desktop
- Managing Instagram Notifications on Desktop
- QuickFixes for Common Issues
- Your Turn: Choose Your Method
- Frequently Asked Questions
Method 1: Official Instagram App (Windows)
The simplest way to get Instagram on a Windows PC is through the official app on the Microsoft Store. It’s free, lightweight, and takes less than a minute to set up.
Step-by-Step Installation
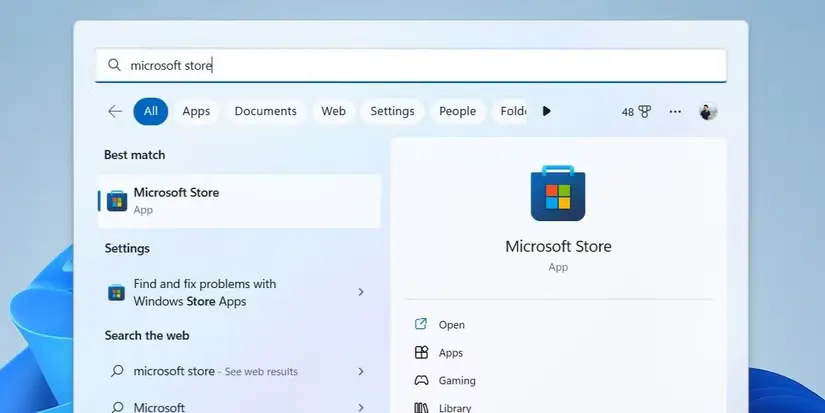
- Search “Microsoft Store” in your Windows search bar and click to open it.
- Type “Instagram” in the store’s search bar and press Enter.
- Select the official Instagram app (published by Meta), then click “Get” and wait for the installation to finish.
- Launch the app and log in with your Instagram credentials.
What You Can and Can’t Do
The Windows app lets you browse your feed, like and comment on posts, send and receive DMs, watch Reels, and upload photos and videos directly from your computer. However, some features work differently than on mobile. For example, Story creation tools and certain editing filters may be limited or absent. Instagram has been gradually expanding desktop capabilities, so it’s worth checking for updates regularly.
System Requirements
- Windows 10 version 10240.0 or higher
- x86, x64, ARM, or ARM64 architecture
- Active internet connection
For smooth performance, make sure your Windows is up to date. This method is ideal for users who want a lightweight, no-fuss way to browse Instagram on their PC.
Method 2: Android Emulator (Windows & Mac)
If you want the full Instagram mobile experience on your desktop including Stories, Reels creation, live streaming, and every filter maybe an Android emulator is the way to go. An emulator runs a virtual Android device on your computer, giving you access to every feature the mobile app offers.
How to Set Up BlueStacks
BlueStacks is one of the most popular and well-tested emulators. Here’s how to get started:
- Go to bluestacks.com (or bignox.com for NoxPlayer) and download the latest version for your operating system.
- Run the installer and follow the on-screen instructions. This may take a few minutes.
- Once BlueStacks opens, sign in with your Google account to access the Play Store.
- Open the Google Play Store inside BlueStacks, search for Instagram, and click Install.
- Open Instagram, log in with your credentials, and you’re good to go.

Is It Safe to Use an Emulator?
Yes, as long as you download it from official sources like bluestacks.com or bignox.com. These emulators run a legitimate copy of Android on your machine. Avoid downloading emulators from third-party or unofficial sites to minimize security risks.
Keep in mind that emulators are resource-intensive. If your system slows down, try closing other apps or lowering the emulator’s graphics settings. This method works best on computers with at least 4 GB of RAM (8 GB recommended) and a modern processor.
Method 3: Instagram Web Version (All Platforms)
The Instagram web version requires no downloads at all and need you to just open a browser and go. It works on Windows, Mac, Linux, and Chromebooks, making it the most accessible option.
How to Access It
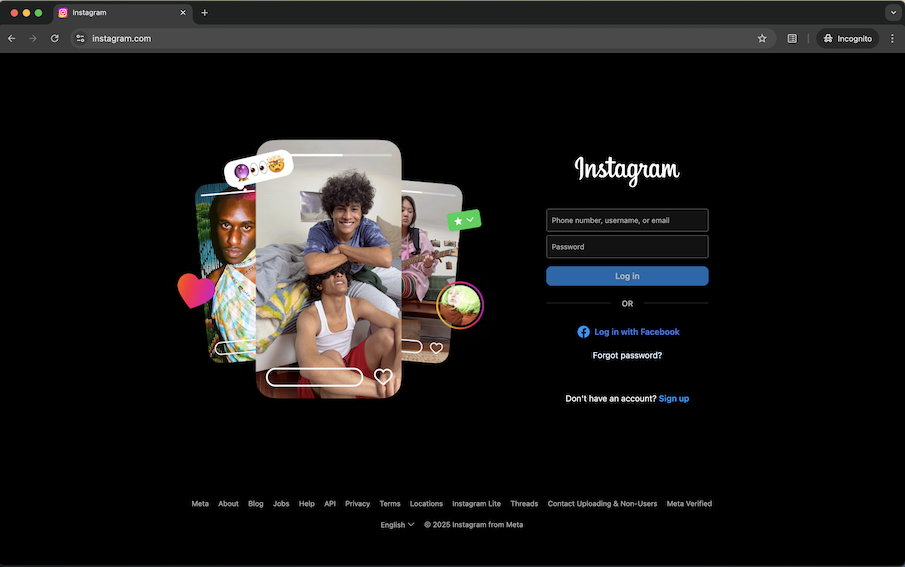
- Open any modern browser (Chrome, Firefox, Edge, or Safari) and go to instagram.com.
- Enter your username and password, or log in with Facebook if your accounts are connected.
- Start browsing your feed, liking posts, commenting, and messaging.
Features Available on the Web
The web version supports feed browsing, posting photos and videos, commenting, liking, direct messaging, and watching Reels. Story uploads are now supported through the web in most regions as well. For the best experience, use an up-to-date browser so you can access the latest features as Instagram rolls them out.
This method is perfect for users who want quick, hassle-free access without installing anything on their computer.
Method 4: Progressive Web App (PWA) for Mac Users
Since there’s no official Instagram app on the Mac App Store, Mac users can use a Progressive Web App (PWA) to turn the Instagram website into an app-like interface that feels native on macOS. A PWA sits in your Dock and opens in its own window and no browser tabs needed.
Install PWA via Chrome
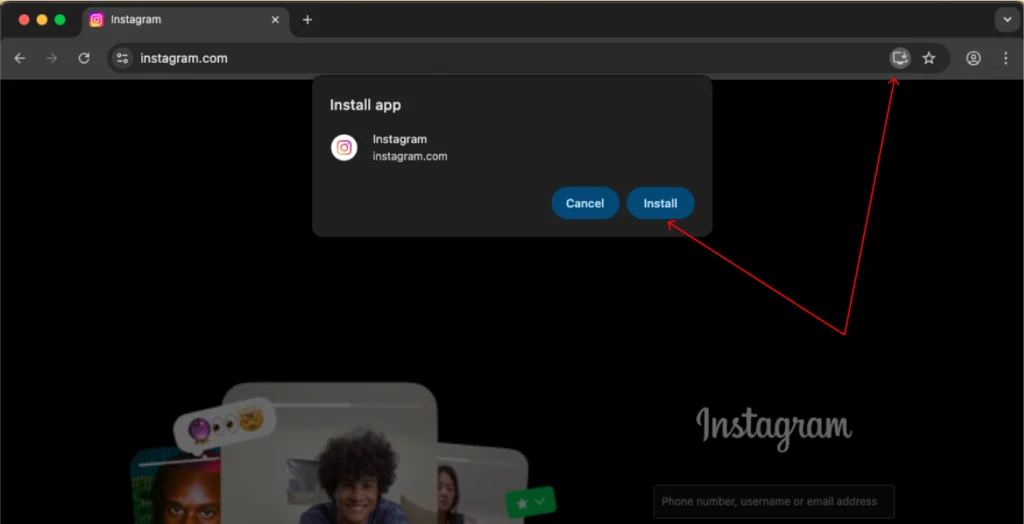
- The app will be added to your Dock and you can use it like a standalone app.
- Open Chrome on your Mac and go to instagram.com.
- Click the install icon at the right end of the address bar, then click “Install” in the prompt.
Install PWA via Safari
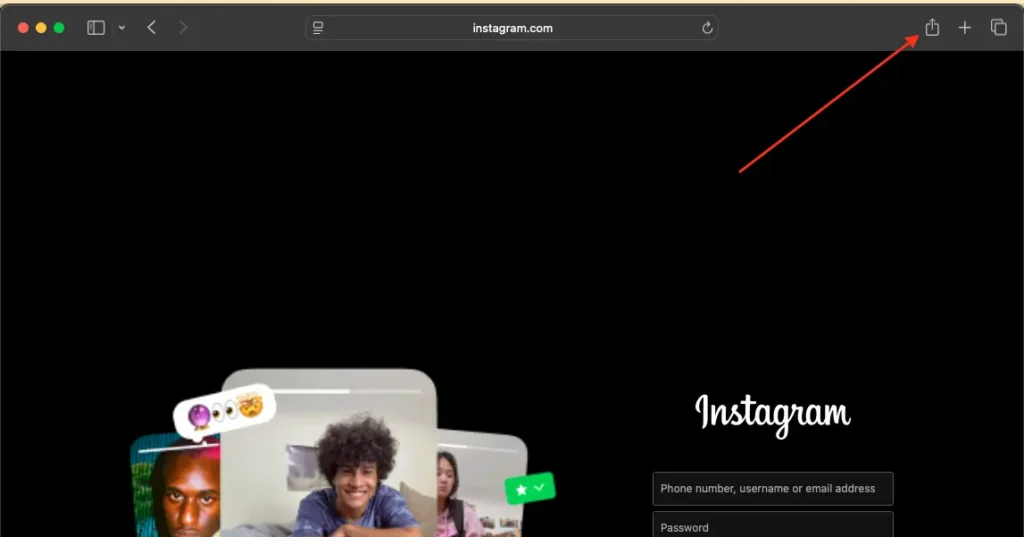
- Open Safari on your Mac and go to instagram.com.
- Click the Share button (next to the address bar) and select “Add to Dock”.
- The Instagram app will now appear in your Dock and you can launch it anytime.
The PWA offers the same functionality as the web version like feed browsing, posting, messaging, and Reels but in a cleaner, dedicated window. It’s lightweight, requires no emulator, and is ideal for Mac users who want a dedicated Instagram experience without heavy software.
Which Method Is Best for You?
Not sure which option to pick? Here’s a side-by-side comparison:
| Method | Works On | Full Mobile Features | Requires Install | Best For |
|---|---|---|---|---|
| Microsoft Store App | Windows 10/11 | Partial | Yes | Casual Windows users who want a clean app |
| Android Emulator | Windows & Mac | Full | Yes | Creators who need Stories, Reels, and Live |
| Web Version | All platforms | Partial | No | Quick access with zero setup |
| PWA (Progressive Web App) | Mac (Chrome/Safari) | Partial | Minimal | Mac users wanting an app-like experience |
Now let’s walk through each method step by step.
How to Post on Instagram from Your Desktop
One of the most common questions about desktop Instagram is whether you can actually upload content. The answer is yes and here’s how, depending on your method:
From the web version or PWA: Click the “+” (create) icon in the top navigation bar. You can drag and drop photos or videos, or click to browse your files. Apply filters, write your caption, add a location, and publish them all from your browser.
From the Windows app: The process is similar. Click the “+” icon, select your media from your computer’s file explorer, edit as needed, and share.
From an emulator: Since you’re running the full mobile app, posting works exactly as it does on a phone. You can create Stories, Reels, carousels, and go Live but the only difference is you’re selecting files from your computer instead of your camera roll.
Tip: If you’re a creator who regularly posts from desktop, consider using Meta’s Creator Studio for scheduling and analytics alongside your chosen method.
Managing Instagram Notifications on Desktop
If you want to stay on top of DMs, comments, and likes without picking up your phone, you can enable desktop notifications:
Windows app: Go to Windows Settings → System → Notifications, and make sure Instagram is toggled on. You’ll receive native Windows notifications for new activity.
Web version / PWA: When you first log in on the web, Instagram may prompt you to enable browser notifications. You can also manage this in your browser settings under Site Permissions → Notifications. Allow notifications for instagram.com to receive alerts directly on your desktop.
Emulator: Notifications work within the emulator itself. BlueStacks has its own notification center, but these won’t appear as native desktop alerts unless you configure BlueStacks settings.
QuickFixes for Common Issues
If you run into problems with any of these methods, here are some quick solutions:
Login Issues: Double-check your credentials and internet connection. If you’re locked out, reset your password at instagram.com. Two-factor authentication codes may also be required if you have 2FA enabled.
App Crashes (Windows): Clear the app’s cache through Windows Settings → Apps → Instagram → Advanced Options → Reset. If that doesn’t work, uninstall and reinstall the app from the Microsoft Store.
Emulator Lag: Lower the emulator’s graphics settings (switch from “Performance” to “Compatibility” mode in BlueStacks) or close background apps to free up system resources.
Web Version Errors: Clear your browser cache and cookies, or try a different browser. Chrome and Edge tend to work best with Instagram’s web interface.
PWA Not Installing: Make sure you’re using the latest version of Chrome or Safari. If the install icon doesn’t appear in Chrome, try refreshing the page or check that PWA support is enabled in your browser flags.
For more detailed troubleshooting, visit the Instagram Help Center. Also you can visit Instagram help center for more detailed support if issues persist.
Your Turn: Choose Your Method
Accessing Instagram on computer is simple with these four methods. The Instagram desktop app via Install Instagram Windows offers a clean, basic experience for browsing. An Instagram emulator provides full mobile functionality, perfect for posting. The Instagram web version is hassle-free with no downloads needed. For Instagram for Mac, the PWA delivers an app-like experience. Select the option that fits your needs and start scrolling, posting, and messaging with social media desktop apps today.
Frequently Asked Questions
Yes. You can upload photos and videos directly from the Instagram web version, PWA, and the Windows app using the “+” (create) button. If you’re using an emulator, you have access to the full posting experience including Stories, Reels, and carousels.
There is no official Instagram for Mac app on the Mac App Store. However, Mac users with Apple Silicon (M1/M2/M3) can install the iOS version from the App Store, use iPhone Mirroring, or set up a PWA via Chrome or Safari as described above.
Yes, provided you download the emulator from reputable sources like bluestacks.com or bignox.com. These are well-established tools that run a legitimate copy of Android. Avoid unofficial download sites to minimize security risks.
Absolutely. Both the Instagram web version and the Windows app fully support direct messaging. You can send text messages, photos, voice notes, and react to messages, all without touching your phone.
Going live is only available through an Android emulator (like BlueStacks) since it requires the full mobile app. The web version, PWA, and Windows app do not currently support Instagram Live broadcasting.
You can watch Reels on the web version, PWA, and Windows app. However, creating and uploading Reels with the full editing suite (effects, audio, transitions) currently requires the mobile app or an emulator.
On the Windows app, enable notifications through Windows Settings → Notifications. For the web version or PWA, allow browser notifications when prompted by Instagram, or adjust permissions manually in your browser’s site settings.
Instagram’s desktop interface is intentionally simplified compared to mobile. Some features like the Explore page, certain filters, and Story creation tools may look or work differently. Using an emulator gives you the closest experience to the mobile app.